frames, transparencies & pattern
I have grouped the following principles together into one project, yet all three of these terms are principles of design in their own right. All of them are used independently of each other, and definitely deserve their own project, yet in light of our limited time with eachother, I have decided to group them into one. Just make sure as you move through this portion, that you keep in mind that we are covering THREE different principles.
frames
Framing occurs everywhere. It is both the act of framing and the choice to eliminate frames that designers utilize in order to present their concept. Frames help to contain a design, or set them apart from a background, another design, or a different element within a composition—you know this as the use of margins. On the other hand, a designer may make the choice to eliminate all frames completely to let a design or image flow directly off the page and expand past the defined borders—a term referred to as full bleed. Framing is useful when organizing elements on a page, or when thinking of how an object will look when placed in its determined environment. Framing is also useful for emphasizing certain elements within a design or artwork, i.e. through color, layout or composition.
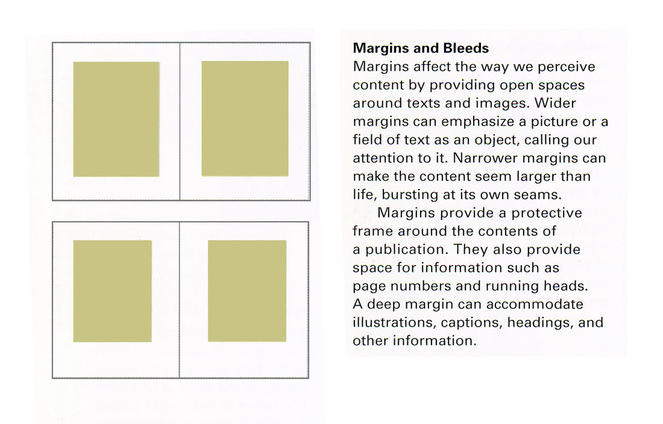
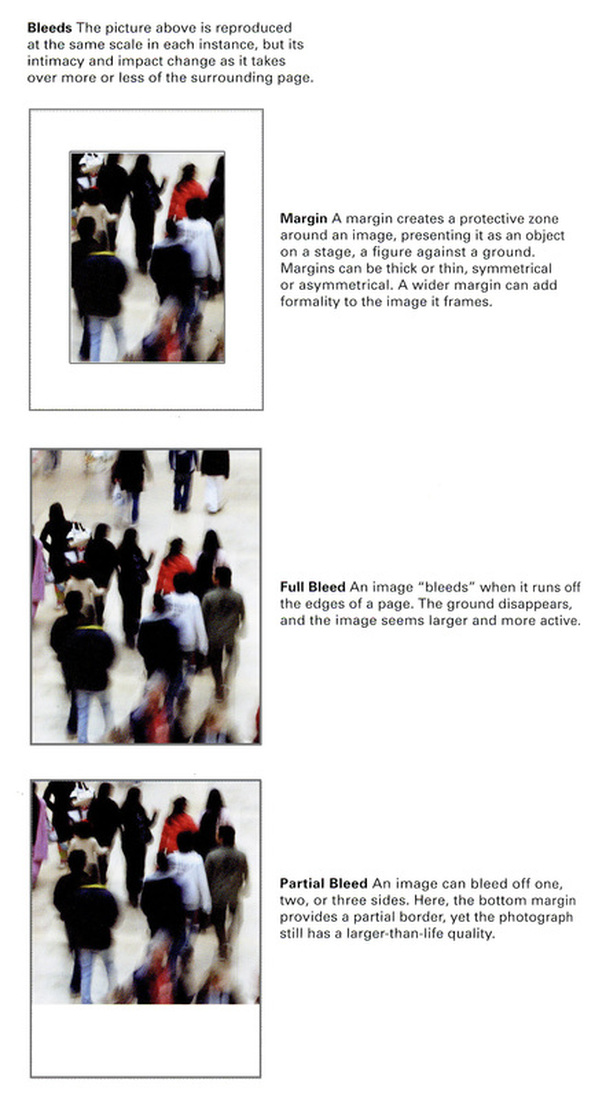
Graphic Design, The New Basics. P104
transparency
In the normal sense of the word, transparency refers to the ability to see through something. Either something is 100% opaque, like a wall made of brick, or it is a 100% transparent, like a wall made of crystal clear glass. In the design world, we use transparencies in order to make connections between layers. We find usefulness in creating relationships between images and objects that otherwise would just sit one on top of the other. Designers are not limited to simply creating transparencies that fall somewhere between 0 – 100%, and often time you will see them use transparencies that are fully opaque, yet reveal certain aspects of the layer underneath—we call this graphic transparency. We achieve these graphic transparencies through the use of typography, pattern and solid shapes and forms that have spaces that reveal what is beneath them.
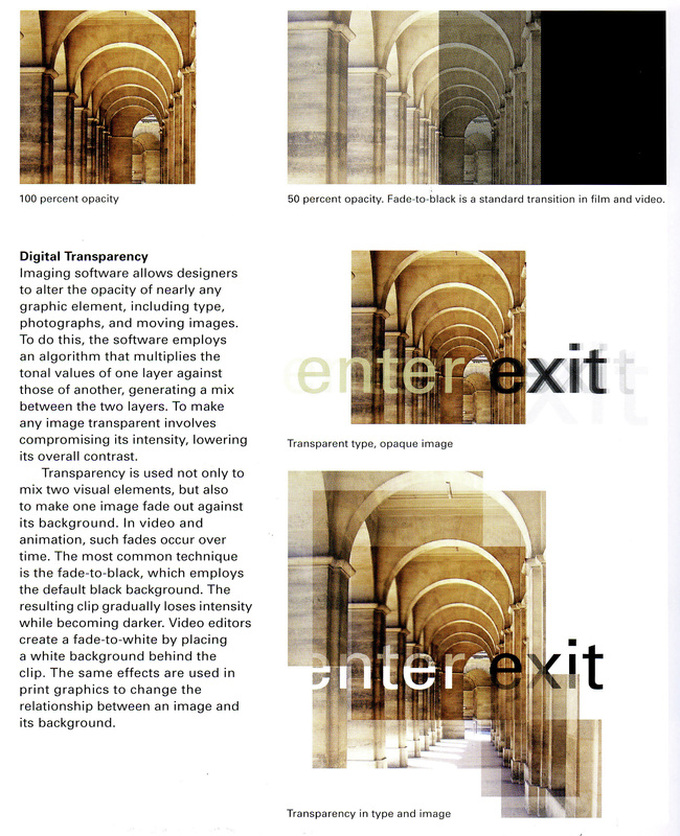
Graphic Design, The New Basics. P154
pattern
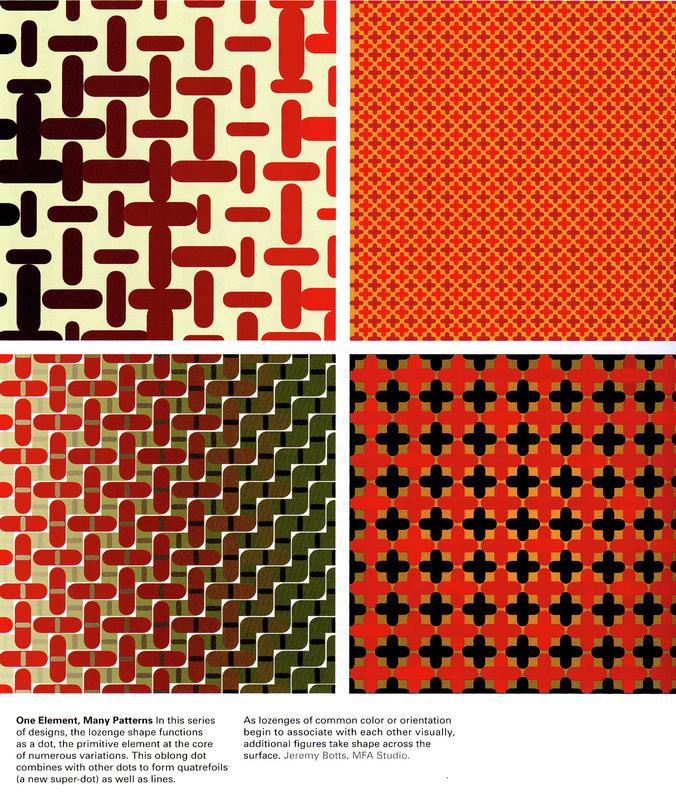
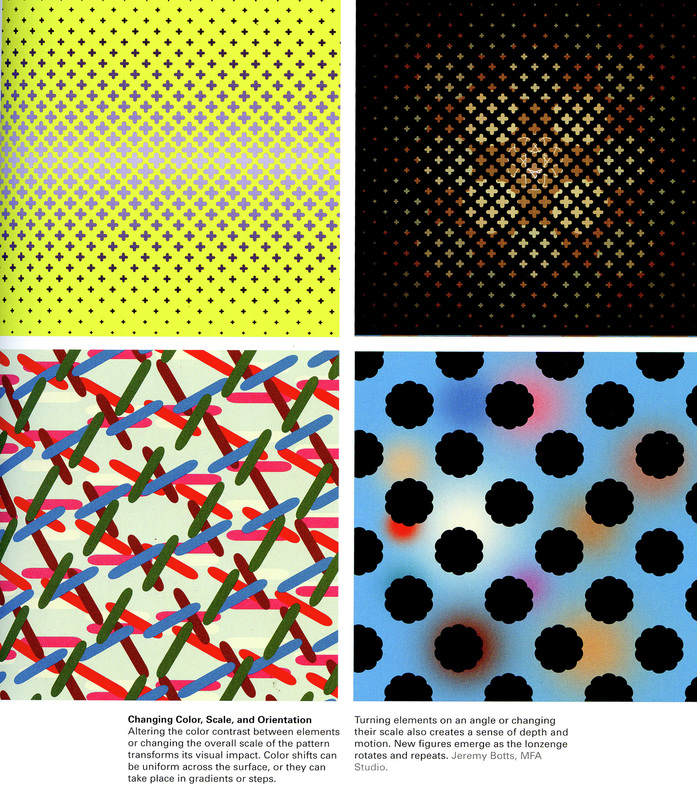
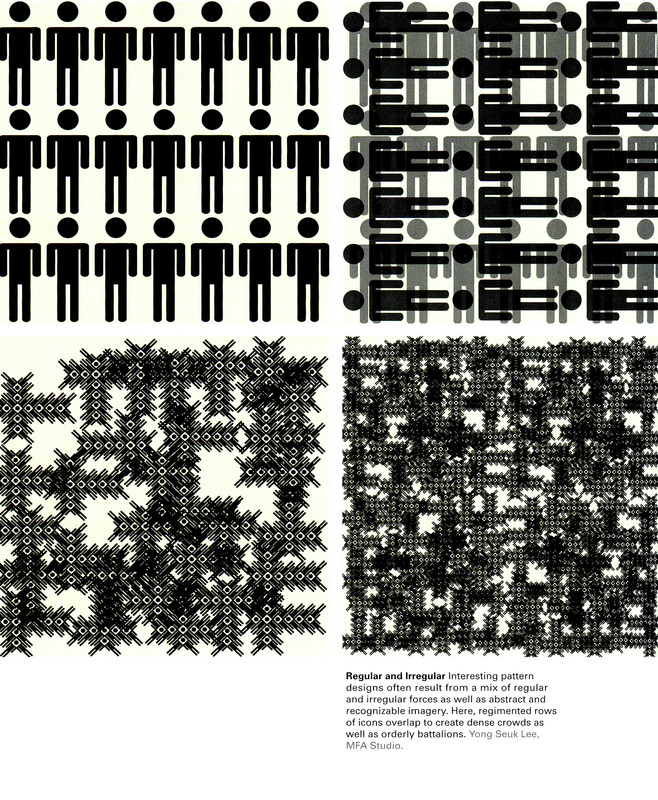
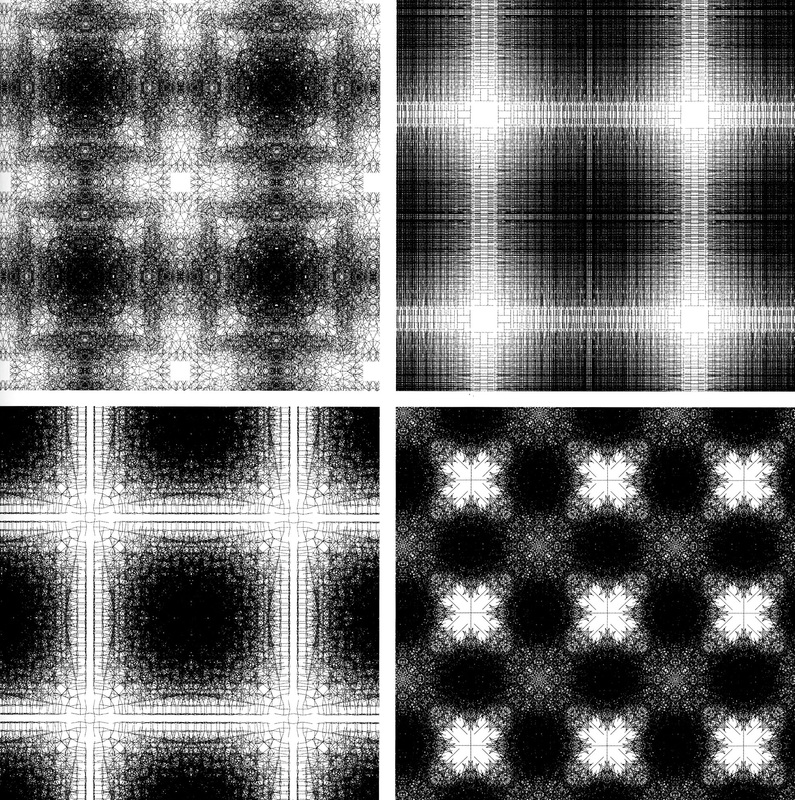
Patterns have been around for a very long time. For almost as long as humans have been making artwork, pattern has been used in ways that work themselves into the very fabric of different cultures. We not only see pattern being created by man, but in existence all around us in the natural world. Pattern shows itself through flora and fauna, natural forces such as erosion and land formation, and even geologic forces such as the repetition of seasons and epochs. Through human contribution, pattern has become a way for cultures to weave their spirituality and their identity into architecture, artwork, clothing and books. With the advent of the computer, we now see a way in which pattern is again being reinvented—through randomness and code. No matter how pattern is being generated, it is an extremely integral part to design, and one that can, if used creatively, help embellish your work with an aesthetic and an originality that is all your own.
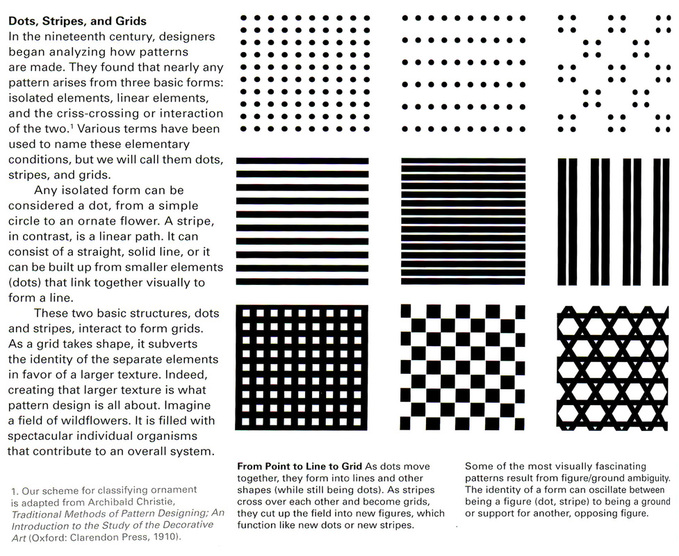
Graphic Design, The New Basics. P186
click to enlarge
So....here we go!
For this project we are going to be introducing a new technique and process that is an integral part of design…photography.
Begin by thinking of an overall concept. If you don’t have a camera that can take a high-resolution picture at home, then you may use one of our cameras at school. We will take one day to go out and shoot pictures here at school to accommodate those of you who don’t have access to a camera, but keep in mind that options for imagery are limited here.
I know that photography is new to so many of you (keeping in mind that snapshots of yourself in front of your bathroom mirror for facebook with your camera phone do not count). Begin looking at resources to help you understand what is available to you. The blogs on our Class Resource page can help you find some great points of interest and inspiration, as well as walk-thru tutorials. For instance, I typed in 'photography' in Smashing Magazine, and the results of that search are here...
Next, we will work with your image in Adobe Photoshop so as to begin to understand all of the tools available to us when working with photographic images. Making sure your image is set to 300 for the resolution, crop your picture to 12in. x 8in, or if your picture is oriented for “portrait,” meaning taller than it is wider, crop it to the opposite dimensions, 8in. x 12in. Once we have perfected our individual images, you will turn this photograph in for a grade…save it as
“YOUR LAST NAME_PHOTO.JPG”
(this marks the end of the first step)
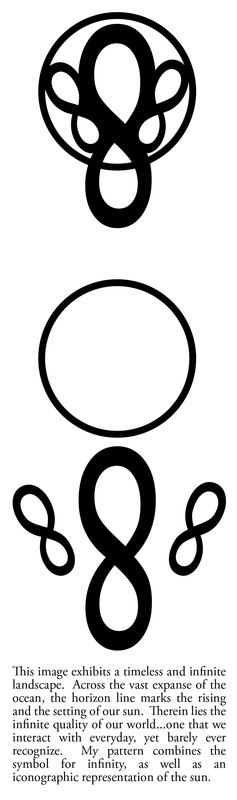
Once this phase is done, you will be hand designing the fundamental parts of your pattern in your sketch book. As you can see in my example, I created one element based off of several parts, which I then repeated in a symmetrical approach. You will need to have a small description as to the inspiration behind your pattern design that will actually become part of the final presentation.
Start by sketching out the concept for your pattern. The pattern design needs to be well thought out and inspired by your photograph. If the pattern doesn’t relate to your photograph, and show a deeper evaluation of your thinking process, you will not be allowed to continue on until it does so. Once you have had your pattern design approved, move into illustrator (the file size doesn’t matter right now), and start by creating the fundamental design of your pattern.
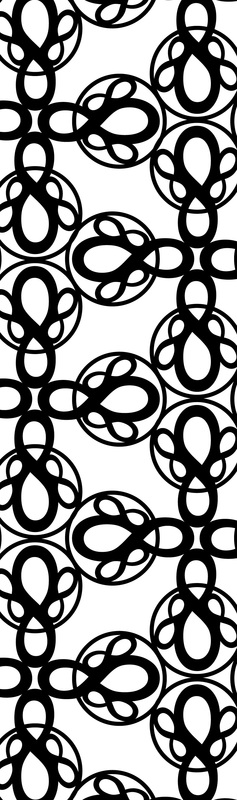
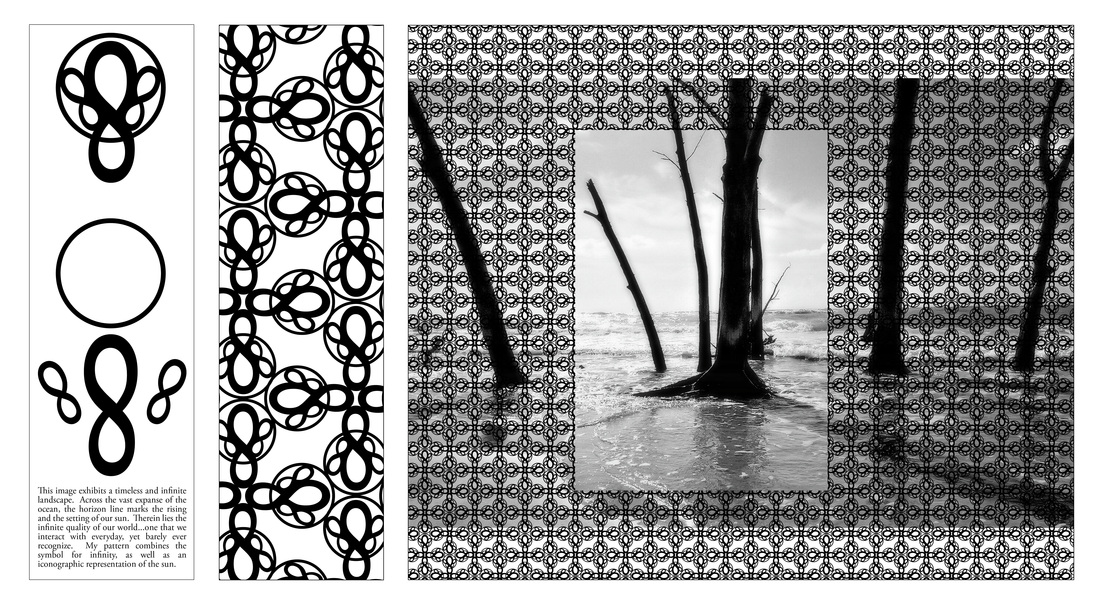
Next… refer to my demo below in order to see how the final composition is to look. The two new files will have the same height or width depending on your images orientation, and they will have equal length or height to each other. The size of the presentation is 12 in. x 10 in.
The one with the description is to be saved as “YOUR LAST NAME_BREAKDOWN.JPG,” and the other one that has the pattern enlarged is to be saved as “YOUR LAST NAME_ENLARGED.JPG”
(this marks the end of the second step)
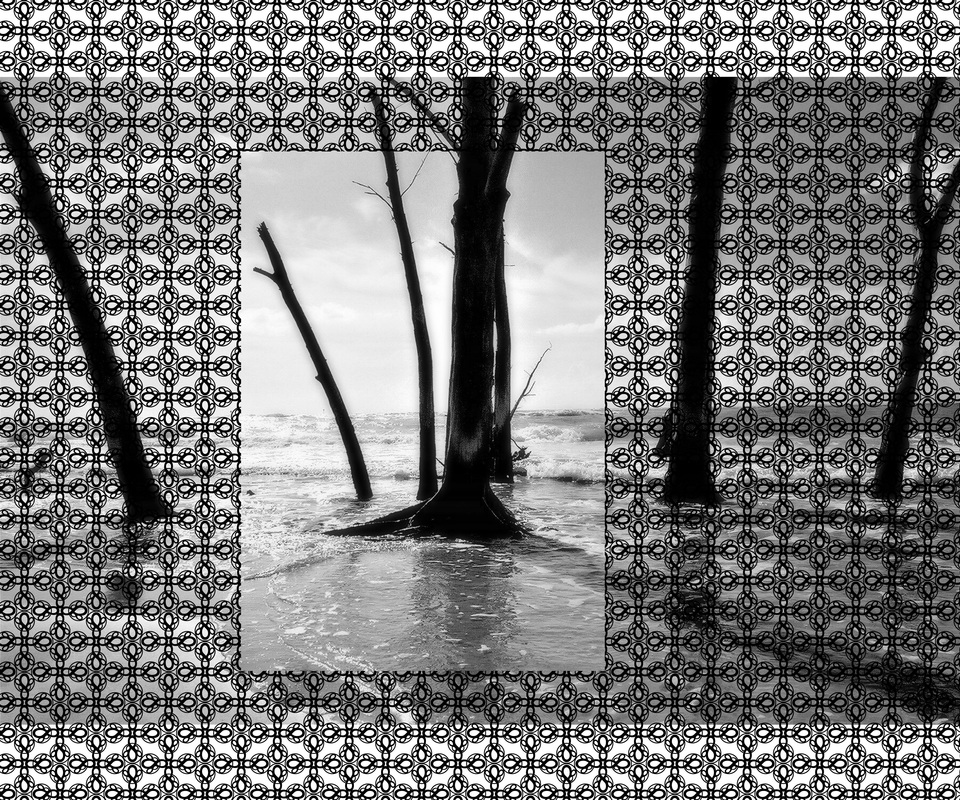
Lastly, once you have your 'breakdown' and cross-section of your pattern complete, create a new document that measures 12in. x 10in., and place your picture in the center (again, if your picture is oriented the other way, set it up opposite to these dimensions).
Unless you have already done so, you will need to go ahead and create the full pattern in illustrator in order to drag it over from illustrator, and place it on top of your image. The pattern should extend off sides of the page. If your pattern is too large once you bring it over, you will need to address that issue in illustrator, and bring it back over again. IF YOU HAVE DIFFICULTY CREATING THE PATTERN, MAKE SURE TO GET MY ASSISTANCE!!!! There are a few ways to do this, so we can work out the best way for you.
Once the layout has been achieved, study your image, and figure out what it is you are trying to reveal through the frame. It is like recreating the composition of the image all over again. There are several ways in which you can choose to do this, and my example shows you only one way in which you can think about this…be creative, but relevant. In other words, don’t make it complicated simply to try and be complicated. Once your new composition is complete, save it as “YOUR LAST NAME_GRAPHIC Transparency.JPG”
For this project we are going to be introducing a new technique and process that is an integral part of design…photography.
Begin by thinking of an overall concept. If you don’t have a camera that can take a high-resolution picture at home, then you may use one of our cameras at school. We will take one day to go out and shoot pictures here at school to accommodate those of you who don’t have access to a camera, but keep in mind that options for imagery are limited here.
I know that photography is new to so many of you (keeping in mind that snapshots of yourself in front of your bathroom mirror for facebook with your camera phone do not count). Begin looking at resources to help you understand what is available to you. The blogs on our Class Resource page can help you find some great points of interest and inspiration, as well as walk-thru tutorials. For instance, I typed in 'photography' in Smashing Magazine, and the results of that search are here...
Next, we will work with your image in Adobe Photoshop so as to begin to understand all of the tools available to us when working with photographic images. Making sure your image is set to 300 for the resolution, crop your picture to 12in. x 8in, or if your picture is oriented for “portrait,” meaning taller than it is wider, crop it to the opposite dimensions, 8in. x 12in. Once we have perfected our individual images, you will turn this photograph in for a grade…save it as
“YOUR LAST NAME_PHOTO.JPG”
(this marks the end of the first step)
Once this phase is done, you will be hand designing the fundamental parts of your pattern in your sketch book. As you can see in my example, I created one element based off of several parts, which I then repeated in a symmetrical approach. You will need to have a small description as to the inspiration behind your pattern design that will actually become part of the final presentation.
Start by sketching out the concept for your pattern. The pattern design needs to be well thought out and inspired by your photograph. If the pattern doesn’t relate to your photograph, and show a deeper evaluation of your thinking process, you will not be allowed to continue on until it does so. Once you have had your pattern design approved, move into illustrator (the file size doesn’t matter right now), and start by creating the fundamental design of your pattern.
Next… refer to my demo below in order to see how the final composition is to look. The two new files will have the same height or width depending on your images orientation, and they will have equal length or height to each other. The size of the presentation is 12 in. x 10 in.
The one with the description is to be saved as “YOUR LAST NAME_BREAKDOWN.JPG,” and the other one that has the pattern enlarged is to be saved as “YOUR LAST NAME_ENLARGED.JPG”
(this marks the end of the second step)
Lastly, once you have your 'breakdown' and cross-section of your pattern complete, create a new document that measures 12in. x 10in., and place your picture in the center (again, if your picture is oriented the other way, set it up opposite to these dimensions).
Unless you have already done so, you will need to go ahead and create the full pattern in illustrator in order to drag it over from illustrator, and place it on top of your image. The pattern should extend off sides of the page. If your pattern is too large once you bring it over, you will need to address that issue in illustrator, and bring it back over again. IF YOU HAVE DIFFICULTY CREATING THE PATTERN, MAKE SURE TO GET MY ASSISTANCE!!!! There are a few ways to do this, so we can work out the best way for you.
Once the layout has been achieved, study your image, and figure out what it is you are trying to reveal through the frame. It is like recreating the composition of the image all over again. There are several ways in which you can choose to do this, and my example shows you only one way in which you can think about this…be creative, but relevant. In other words, don’t make it complicated simply to try and be complicated. Once your new composition is complete, save it as “YOUR LAST NAME_GRAPHIC Transparency.JPG”
Works Cited
Lupton, Ellen & Jennifer Cole Phillips. Graphic Design, The New Basics. New York, Princeton Architectural Press, 2008.
Lupton, Ellen & Jennifer Cole Phillips. Graphic Design, The New Basics. New York, Princeton Architectural Press, 2008.
